Encoder Software
Overview
These instructions guide you through setting up OBS (Open Broadcaster Software) to send an audio stream to Soonia, which supports the WHIP protocol. A WHIP link and a specific token provided by Soonia are required.
You can download OBS HERE
Prerequisites
- OBS installed on your computer.
- Access to Soonia with a valid account.
- An audio capture card compatible with OBS.
You can find a compatible audio capture card HERE
#1 Setting Up the Scene in OBS
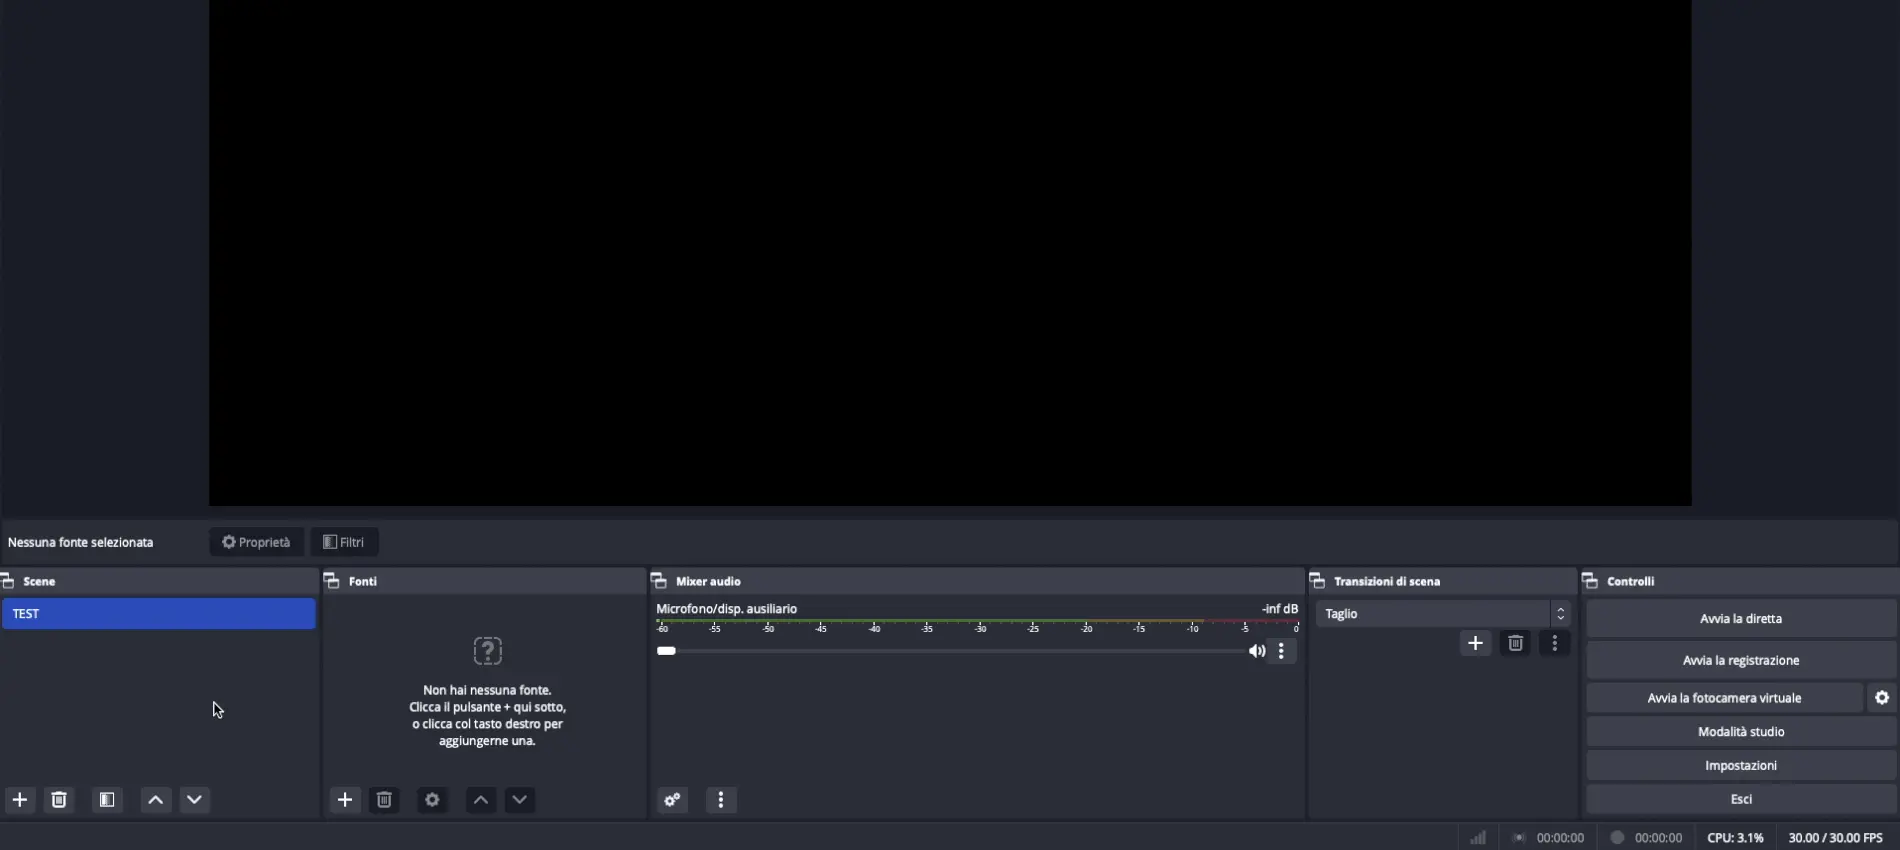
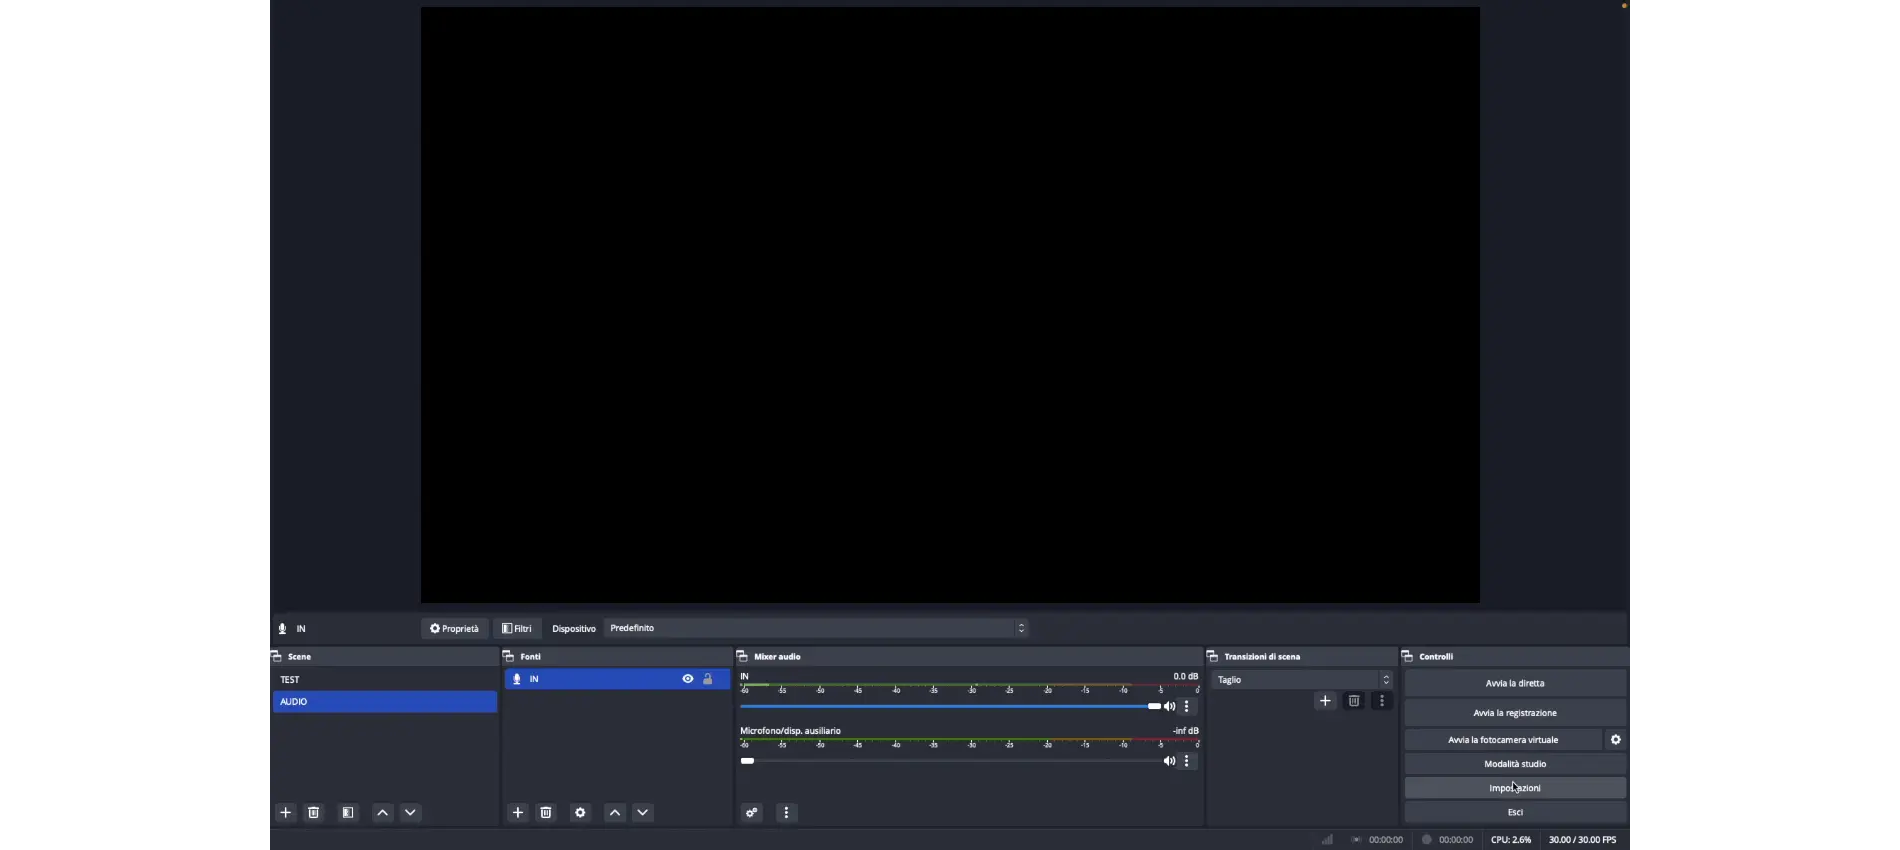
- Create a New Scene: Open OBS and in the "Scenes" section, create a scene dedicated to audio streaming.
- Add Audio Sources: Add the audio sources you want to broadcast to the scene.
- Select Device: Select the correct audio capture device.

#2 Obtaining WHIP Link and Token from Soonia
- Access Soonia: Log in to the Soonia platform.
- Select Your Event: Choose the event you created earlier.
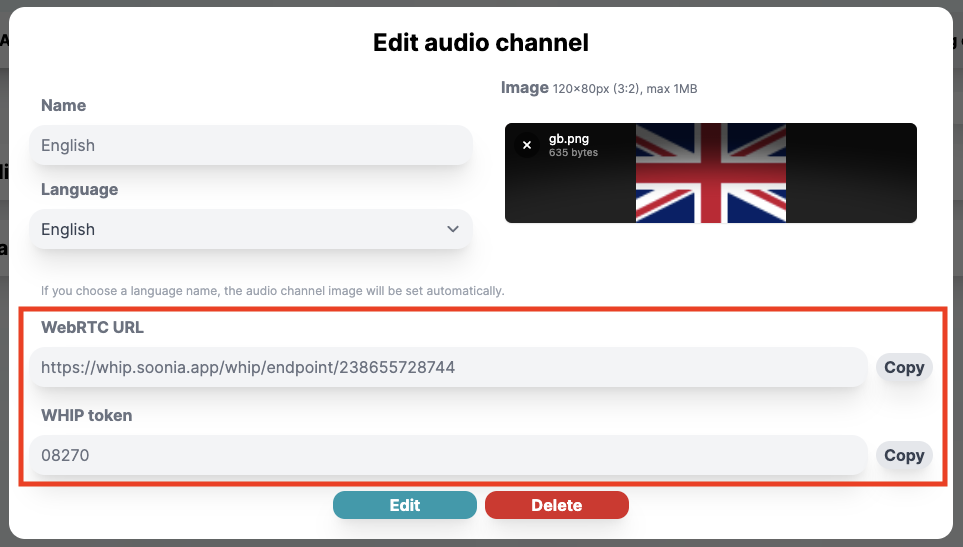
- Retrieve WHIP Link and Token: In the audio channels section of Soonia, click 'Edit' to get the information about the WHIP address and its token.

If you encounter any issues, you can contact us via chat or at [email protected]
#3 Configuring WHIP Information in OBS
- Server Settings: In OBS, go to
Settings > Streams. - Input WHIP Data: Select
WHIPas the streaming service and enter the WHIP link and token obtained earlier into the appropriate fields.

#4 Directing Configuration
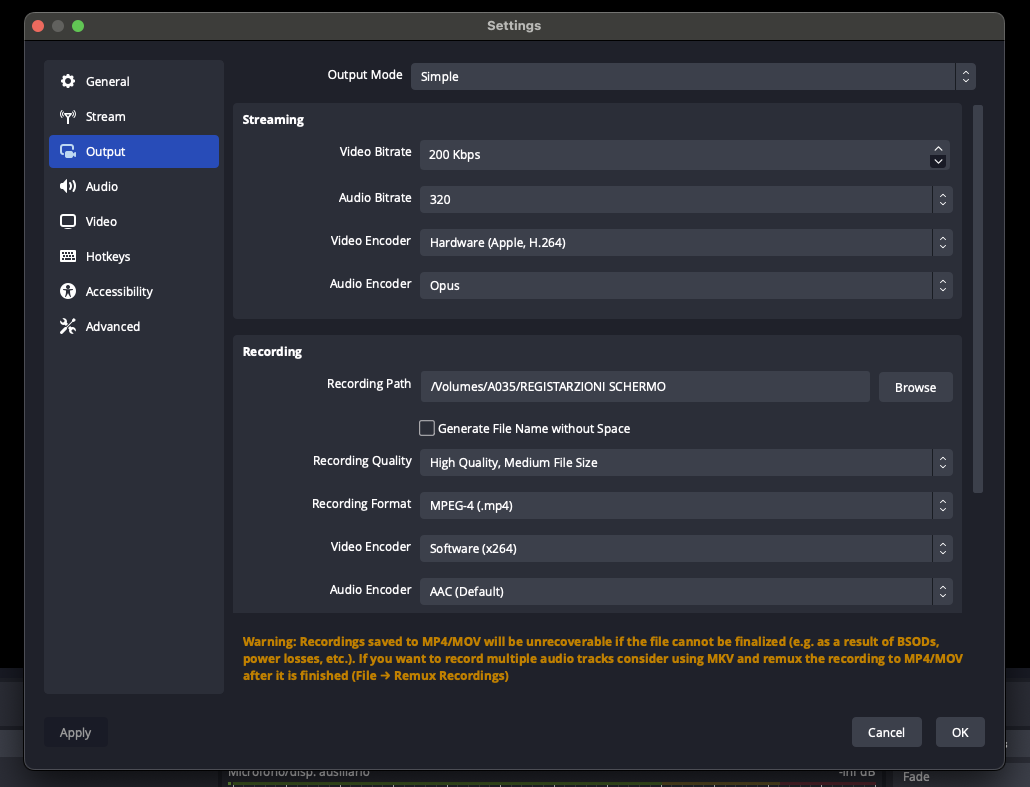
- Output Settings: Navigate to
Settings > Outputin OBS. - Select Mode: Choose the simple mode from the dropdown.
- Set Video Bitrate: Set the video bitrate to the minimum, which is 200 Kbps.
- Set Audio Bitrate: Adjust the audio bitrate according to the desired quality of the audio you want to transmit, bearing in mind that a higher bitrate requires a faster internet connection.
- Select Video Encoder: Choose a suitable video encoder under "Audio Bitrate", preferably a hardware encoder if available.
- Select Audio Encoder: Choose an 'Opus' audio encoder; this choice **is crucial as only this type of encoder is compatible with Soonia.

#5 Initiating the Stream
- Audio Flow Check: Ensure that the audio stream is correct in OBS.
- Start Broadcasting: Click on "Start Streaming" to begin sending the audio to Soonia.
#6 Monitoring and Troubleshooting
Ensure that the streaming flow is stable and that OBS does not indicate any connection errors. To verify that the audio stream arrives correctly in Soonia, check in the dashboard under "Control Room" that the button associated with the audio channel is green and reads "Active". If the audio stream is not active correctly, the button will be red and read "Inactive".

- The streaming quality depends on the internet connection and computer specifications. It is recommended to perform a preliminary streaming test in a controlled environment before proceeding with a live broadcast.
If you encounter any issues, you can contact us via chat or at [email protected]